Merhabalar,
5 dk. Cacti kurup kullanmaya başlamak ister misiniz? Hemde bir kaç basit komut ile :)
Container dünyasına basit uygulamalı giriş yapmış oluyoruz. Docker container kullanımı bilmeniz şart değil. Belki öğrenmenize teşvik bile edebiliriz :)
Elimizde Linux bir sunucu olduğunu düşünün. Cacti kurmak için web-server ve db kurup ayarlarını yapmamız gerekecek. Biz ise bu yapımızda 2 container (cacti webserver ve db) ilişkili hazır cacti kurup ayağa kaldıracağız. Dilerseniz ilerde bu sunucu üzerindeki dockerda başka containerlarda çalıştırabilirsiniz. Mesala Network config yedeği alan rancid gibi...
Hazırlık:
Debian 10.7.0 versiyonunu kullanacağim. gnome ve xcfc gibi masa üstü servislerini kurmadan sadece ssh server özelliği kurdum.
Güncel tutmak için:
root@debian:/home/enes# apt update
Get:1 http://security.debian.org/debian-security buster/updates InRelease [65.4 kB]
Hit:2 http://deb.debian.org/debian buster InRelease
Get:3 http://deb.debian.org/debian buster-updates InRelease [51.9 kB]
Fetched 117 kB in 1s (147 kB/s)
Reading package lists... Done
Building dependency tree
Reading state information... Done
All packages are up to date.
root@debian:/home/enes# apt upgrade
Reading package lists... Done
Building dependency tree
Reading state information... Done
Calculating upgrade... Done
0 upgraded, 0 newly installed, 0 to remove and 0 not upgraded.
root@debian:/home/enes# apt install date
Reading package lists... Done
Building dependency tree
Reading state information... Done
E: Unable to locate package date
wget ve curl yazılımlarını kuralım.
root@debian:/home/enes# apt install wget curlReading package lists... DoneBuilding dependency treeReading state information... Donecurl is already the newest version (7.64.0-4+deb10u1).wget is already the newest version (1.20.1-1.1).0 upgraded, 0 newly installed, 0 to remove and 0 not upgraded.
Sunucumuzun timezone değirini kontrol edelim. Bozuksa düzeltelim.
Benim timezone hatalı
root@debian:/home/enes# dateSun 20 Dec 2020 07:15:47 AM EST
root@debian:/home/enes# timedatectlLocal time: Sun 2020-12-20 07:16:21 ESTUniversal time: Sun 2020-12-20 12:16:21 UTCRTC time: Sun 2020-12-20 12:16:21Time zone: US/Eastern (EST, -0500)System clock synchronized: yesNTP service: activeRTC in local TZ: no
root@debian:/home/enes# ls -l /etc/localtimelrwxrwxrwx 1 root root 30 Dec 19 17:25 /etc/localtime -> /usr/share/zoneinfo/US/Eastern
Debian 10 için Timezone düzeltme komutumuz:
root@debian:/home/enes# timedatectl set-timezone Asia/Baghdad
Tekrar kontrol ettiğimizde düzeldiğini görüyoruz.
root@debian:/home/enes# ls -l /etc/localtimelrwxrwxrwx 1 root root 34 Dec 20 15:17 /etc/localtime -> ../usr/share/zoneinfo/Asia/Baghdadroot@debian:/home/enes# timedatectlLocal time: Sun 2020-12-20 15:17:52 +03Universal time: Sun 2020-12-20 12:17:52 UTCRTC time: Sun 2020-12-20 12:17:52Time zone: Asia/Baghdad (+03, +0300)System clock synchronized: yesNTP service: activeRTC in local TZ: no
Docker Kurulumu:
Birçok docker kurulumu var internetten bakabilirsiniz. Hatta eğitim bile alabilirsiniz. Biz en kolay olanı yapacağız. Hangi linux sürünümü veya versiyonunu kullandığınızı algılayıp sizin yerinize kuruyor.
https://get.docker.com bu sayfayı açıyoruz.
Bizden aşağıdaki 2 komut çalıştırmamızı istiyor :
# This script is meant for quick & easy install via:
#   $ curl -fsSL https://get.docker.com -o get-docker.sh
# $ sh get-docker.sh
root@debian:/home/enes# curl -fsSL https://get.docker.com -o get-docker.sh
root@debian:/home/enes# sh get-docker.sh# Executing docker install script, commit: 3d8fe77c2c46c5b7571f94b42793905e5b3e42e4+ sh -c apt-get update -qq >/dev/null+ sh -c DEBIAN_FRONTEND=noninteractive apt-get install -y -qq apt-transport-https ca-certificates curl gnupg >/dev/null+ sh -c curl -fsSL "https://download.docker.com/linux/debian/gpg" | apt-key add -qq - >/dev/nullWarning: apt-key output should not be parsed (stdout is not a terminal)+ sh -c echo "deb [arch=amd64] https://download.docker.com/linux/debian buster stable" > /etc/apt/sources.list.d/docker.list+ sh -c apt-get update -qq >/dev/null+ [ -n ]+ sh -c apt-get install -y -qq --no-install-recommends docker-ce >/dev/null+ sh -c docker versionClient: Docker Engine - CommunityVersion: 20.10.1API version: 1.41Go version: go1.13.15Git commit: 831ebeaBuilt: Tue Dec 15 04:34:48 2020OS/Arch: linux/amd64Context: defaultExperimental: trueServer: Docker Engine - CommunityEngine:Version: 20.10.1API version: 1.41 (minimum version 1.12)Go version: go1.13.15Git commit: f001486Built: Tue Dec 15 04:32:45 2020OS/Arch: linux/amd64Experimental: falsecontainerd:Version: 1.4.3GitCommit: 269548fa27e0089a8b8278fc4fc781d7f65a939brunc:Version: 1.0.0-rc92GitCommit: ff819c7e9184c13b7c2607fe6c30ae19403a7affdocker-init:Version: 0.19.0GitCommit: de40ad0If you would like to use Docker as a non-root user, you should now consideradding your user to the "docker" group with something like:sudo usermod -aG docker your-userRemember that you will have to log out and back in for this to take effect!WARNING: Adding a user to the "docker" group will grant the ability to runcontainers which can be used to obtain root privileges on thedocker host.Refer to https://docs.docker.com/engine/security/security/#docker-daemon-attack-surfacefor more information.root@debian:/home/enes# docker -versionunknown shorthand flag: 'e' in -ersionSee 'docker --help'.Usage: docker [OPTIONS] COMMANDA self-sufficient runtime for containersOptions:--config string Location of client config files (default "/root/.docker")-c, --context string Name of the context to use to connect to the daemon (overrides DOCKER_HOST env var and default context set with "dockercontext use")-D, --debug Enable debug mode-H, --host list Daemon socket(s) to connect to-l, --log-level string Set the logging level ("debug"|"info"|"warn"|"error"|"fatal") (default "info")--tls Use TLS; implied by --tlsverify--tlscacert string Trust certs signed only by this CA (default "/root/.docker/ca.pem")--tlscert string Path to TLS certificate file (default "/root/.docker/cert.pem")--tlskey string Path to TLS key file (default "/root/.docker/key.pem")--tlsverify Use TLS and verify the remote-v, --version Print version information and quitManagement Commands:app* Docker App (Docker Inc., v0.9.1-beta3)builder Manage buildsbuildx* Build with BuildKit (Docker Inc., v0.5.0-docker)config Manage Docker configscontainer Manage containerscontext Manage contextsimage Manage imagesmanifest Manage Docker image manifests and manifest listsnetwork Manage networksnode Manage Swarm nodesplugin Manage pluginssecret Manage Docker secretsservice Manage servicesstack Manage Docker stacksswarm Manage Swarmsystem Manage Dockertrust Manage trust on Docker imagesvolume Manage volumesCommands:attach Attach local standard input, output, and error streams to a running containerbuild Build an image from a Dockerfilecommit Create a new image from a container's changescp Copy files/folders between a container and the local filesystemcreate Create a new containerdiff Inspect changes to files or directories on a container's filesystemevents Get real time events from the serverexec Run a command in a running containerexport Export a container's filesystem as a tar archivehistory Show the history of an imageimages List imagesimport Import the contents from a tarball to create a filesystem imageinfo Display system-wide informationinspect Return low-level information on Docker objectskill Kill one or more running containersload Load an image from a tar archive or STDINlogin Log in to a Docker registrylogout Log out from a Docker registrylogs Fetch the logs of a containerpause Pause all processes within one or more containersport List port mappings or a specific mapping for the containerps List containerspull Pull an image or a repository from a registrypush Push an image or a repository to a registryrename Rename a containerrestart Restart one or more containersrm Remove one or more containersrmi Remove one or more imagesrun Run a command in a new containersave Save one or more images to a tar archive (streamed to STDOUT by default)search Search the Docker Hub for imagesstart Start one or more stopped containersstats Display a live stream of container(s) resource usage statisticsstop Stop one or more running containerstag Create a tag TARGET_IMAGE that refers to SOURCE_IMAGEtop Display the running processes of a containerunpause Unpause all processes within one or more containersupdate Update configuration of one or more containersversion Show the Docker version informationwait Block until one or more containers stop, then print their exit codesRun 'docker COMMAND --help' for more information on a command.To get more help with docker, check out our guides at https://docs.docker.com/go/guides/
Kurulum bitti. Bende 2 dk sürmedi. Belki internet hızımdan kaynaklı şaşırdım.(20mbps). Kurulum başarılımı kontrol edelim. Docker versiyonu öğrenelim.
root@debian:/home/enes# docker --versionDocker version 20.10.1, build 831ebea
Evet , gerçekten docker kurulumu bitti. Şimdi Compose toolunu kuralım.
https://docs.docker.com/compose/install/
İlgili sayfa yukarıda.Güncel versiyonu çıkarsa yukarıdan komutu güncelleyin.
root@debian:/home/enes/iso# curl -L "https://github.com/docker/compose/releases/download/1.27.4/docker-compose-$(uname -s)-$(uname -m)" -o /usr/local/bin/docker-compose% Total % Received % Xferd Average Speed Time Time Time CurrentDload Upload Total Spent Left Speed100 651 100 651 0 0 1269 0 --:--:-- --:--:-- --:--:-- 1269100 11.6M 100 11.6M 0 0 662k 0 0:00:18 0:00:18 --:--:-- 597kroot@debian:/home/enes/iso# chmod +x /usr/local/bin/docker-compose
Kontrol edelim:
root@debian:/home/enes/iso# docker-compose --versiondocker-compose version 1.27.4, build 40524192
Cacti-Docker kurulumu:
https://github.com/scline/docker-cacti
Yukarıdaki sayfadaki arkadaşımızın çalışmasını baz alacağız. Yukarıdaki sayfada çok fazla detay var. Okuyabilirsiniz. Benim amacım türkçe ve basit düzeyde size anlatmak. Arkadaşımız oturmuş uğraşmış cacti için güzel container hazırlamış. Kendisine teşekkür ederiz. Sizde buna benzer kendiniz de docker uzmanı olduğunuzda kendi uygulamalarınız için hazır containerlar hazırlayabilirsiniz.
Compose ise birbiri ile ilişkili containerların tüm değişken parametrelerin içinde bulunduğu conf. dosyası diyebilirsiniz.
compose dosyamızı indiriyoruz.
Sayfamız:
https://github.com/scline/docker-cacti/tree/master/docker-compose
https://github.com/scline/docker-cacti/blob/master/docker-compose/cacti_single_install.yml
İndirdiğimiz compose dosyamızı inceleyelim.
version: '3.5'
services:


  cacti:
    image: "smcline06/cacti"
    container_name: cacti
    domainname: example.com
    hostname: cacti
    ports:
      - "80:80"
      - "443:443"
    environment:
      - DB_NAME=cacti_master
      - DB_USER=cactiuser
      - DB_PASS=cactipassword
      - DB_HOST=db
      - DB_PORT=3306
      - DB_ROOT_PASS=rootpassword
      - INITIALIZE_DB=1
      - TZ=America/Los_Angeles
    volumes:
      - cacti-data:/cacti
      - cacti-spine:/spine
      - cacti-backups:/backups
    links:
      - db


  db:
    image: "mariadb:10.3"
    container_name: cacti_db
    domainname: example.com
    hostname: db
    ports:
      - "3306:3306"
    command:
      - mysqld
      - --character-set-server=utf8mb4
      - --collation-server=utf8mb4_unicode_ci
      - --max_connections=200
      - --max_heap_table_size=128M
      - --max_allowed_packet=32M
      - --tmp_table_size=128M
      - --join_buffer_size=128M
      - --innodb_buffer_pool_size=1G
      - --innodb_doublewrite=ON
      - --innodb_flush_log_at_timeout=3
      - --innodb_read_io_threads=32
      - --innodb_write_io_threads=16
      - --innodb_buffer_pool_instances=9
      - --innodb_file_format=Barracuda
      - --innodb_large_prefix=1
      - --innodb_io_capacity=5000
      - --innodb_io_capacity_max=10000
    environment:
      - MYSQL_ROOT_PASSWORD=rootpassword
      - TZ=America/Los_Angeles
    volumes:
      - cacti-db:/var/lib/mysql


volumes:
  cacti-db:
  cacti-data:
  cacti-spine:
  cacti-backups:
Kırmızıya boyadığım kısımlardaki timezoneları düzeltmemiz lazım.
" - TZ=Asia/Baghdad"
Yerimiz belli olsun diye birde cacti isimli klasör açıyorum.
root@debian:/home/enes# cd cacti/
root@debian:/home/enes/cacti# vi cacti_single_install.yml
cacti_single_install.yml
Hazırız. artık compose ayağa kaldıralım. -f dosya gösteriyoruz. -d arkaplanda çalış diyoruz.
root@debian:/home/enes/cacti# docker-compose -f cacti_single_install.yml up -dCreating network "cacti_default" with the default driverCreating volume "cacti_cacti-db" with default driverCreating volume "cacti_cacti-data" with default driverCreating volume "cacti_cacti-spine" with default driverCreating volume "cacti_cacti-backups" with default driverPulling db (mariadb:10.3)...10.3: Pulling from library/mariadbda7391352a9b: Pull complete14428a6d4bcd: Pull complete2c2d948710f2: Pull complete22776aa82430: Pull complete90e64230d63d: Pull completef30861f14a10: Pull completee8e9e6a3da24: Pull complete420a23f08c41: Pull completebd73f23de482: Pull complete739c71d82551: Pull complete65465f3a9066: Pull complete1d96eca58ffe: Pull complete13ddb412bd22: Pull completeDigest: sha256:25d59d64013285f77db2e252c1b2cd390dc639773ae4f5132b90f539cfba27d4Status: Downloaded newer image for mariadb:10.3Creating cacti_db ... doneCreating cacti ... done
2 dk sürmedi yine . Evet cacti kuruldu ve ayağa kalktı. Linux sunucumuzun ipsini öğrenelim.
root@debian:/home/enes/cacti# ip addr1: lo: <LOOPBACK,UP,LOWER_UP> mtu 65536 qdisc noqueue state UNKNOWN group default qlen 1000link/loopback 00:00:00:00:00:00 brd 00:00:00:00:00:00inet 127.0.0.1/8 scope host lovalid_lft forever preferred_lft foreverinet6 ::1/128 scope hostvalid_lft forever preferred_lft forever2: eth0: <BROADCAST,MULTICAST,UP,LOWER_UP> mtu 1500 qdisc mq state UP group default qlen 1000link/ether 00:15:5d:01:67:02 brd ff:ff:ff:ff:ff:ffinet 172.28.115.223/20 brd 172.28.127.255 scope global dynamic eth0valid_lft 79356sec preferred_lft 79356secinet6 fe80::215:5dff:fe01:6702/64 scope linkvalid_lft forever preferred_lft forever3: docker0: <NO-CARRIER,BROADCAST,MULTICAST,UP> mtu 1500 qdisc noqueue state DOWN group defaultlink/ether 02:42:88:36:d5:27 brd ff:ff:ff:ff:ff:ffinet 172.17.0.1/16 brd 172.17.255.255 scope global docker0valid_lft forever preferred_lft forever9: br-abd6962118d3: <BROADCAST,MULTICAST,UP,LOWER_UP> mtu 1500 qdisc noqueue state UP group defaultlink/ether 02:42:8c:b8:b5:6a brd ff:ff:ff:ff:ff:ffinet 172.19.0.1/16 brd 172.19.255.255 scope global br-abd6962118d3valid_lft forever preferred_lft foreverinet6 fe80::42:8cff:feb8:b56a/64 scope linkvalid_lft forever preferred_lft forever11: veth8261430@if10: <BROADCAST,MULTICAST,UP,LOWER_UP> mtu 1500 qdisc noqueue master br-abd6962118d3 state UP group defaultlink/ether 8e:bd:9b:3d:22:e5 brd ff:ff:ff:ff:ff:ff link-netnsid 0inet6 fe80::8cbd:9bff:fe3d:22e5/64 scope linkvalid_lft forever preferred_lft forever13: veth48ca71d@if12: <BROADCAST,MULTICAST,UP,LOWER_UP> mtu 1500 qdisc noqueue master br-abd6962118d3 state UP group defaultlink/ether ea:88:d5:9b:4e:51 brd ff:ff:ff:ff:ff:ff link-netnsid 1inet6 fe80::e888:d5ff:fe9b:4e51/64 scope linkvalid_lft forever preferred_lft forever
Cacti Web kurulum:
Sunucumuzun ipsi 172.28.115.223 miş. Şimdi kendi bilgisayarımızın browserdan bu ip çağırarak 1 kez cacti bildiğimiz kurulum ekranı gelmesini sağlıyoruz.

Sayfamız geldi. admin/admin şeklinde ilk şifremizi giriyoruz.

Admin şifremizi değiştiriyoruz. Yeni şifremizde :en az 8 karakter, küçük harf,büyük harf, rakam ve karakter olacak.

Dilimizi türkçe yapıp lisans anlaşmasını kabul ediyoruz.

Devam ediyoruz.

Devam ediyoruz.

Devam ediyoruz.

Hiç hata vermedi. Devam ediyoruz.

Kabul edip devam ediyoruz.

Devam ediyoruz.

Devam ediyoruz.

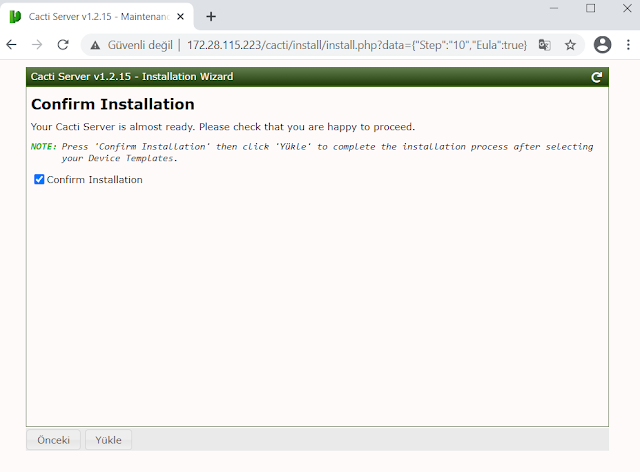
Kurmaya başlıyoruz.

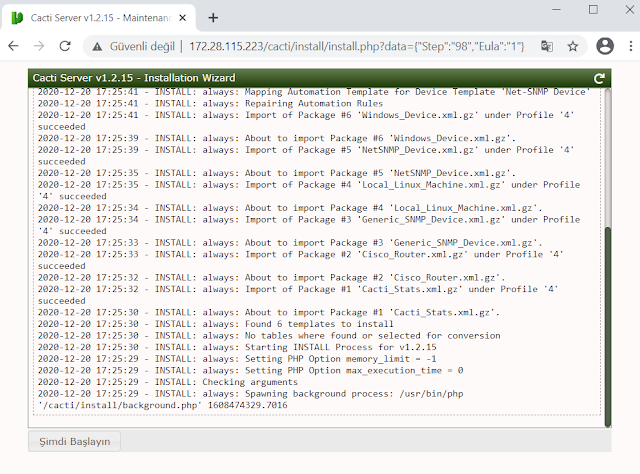
Bitti:)

Artık rahat bir şekilde son sürüm ve tüm tüm fonsiyonları tam cacti kullabilirsiniz.
Docker üzerindeki son durum nedir?
Kontrol edelim.
root@debian:/home/enes/cacti# docker psCONTAINER ID IMAGE COMMAND CREATED STATUS PORTS NAMESa2e3f08faee0 smcline06/cacti "/start.sh" 19 minutes ago Up 19 minutes 0.0.0.0:80->80/tcp, 0.0.0.0:443->443/tcp cacti1bdeb602814b mariadb:10.3 "docker-entrypoint.s…" 19 minutes ago Up 19 minutes 0.0.0.0:3306->3306/tcp cacti_db
root@debian:/home/enes/cacti# docker volume lsDRIVER VOLUME NAMElocal cacti_cacti-backupslocal cacti_cacti-datalocal cacti_cacti-dblocal cacti_cacti-spine
containerler açılıp kapansada volume dediğimiz kalıcı yerlerde bizim datalarımız saklanacak.
Sonuç:
Bence başlangıç için bu kadar docker yeterli. Sizde 5 dk kurabilecek misiniz? Yorumlara yazarsanız sevinirim.